
|
home gallery |
| projects philosophy faq | |
 |
free plans: how to make a Vertical Organizer |
| Basic Description |
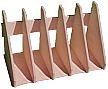
This simple organizer neatly stores papers, files, books, magazines, catalogs etc. We have provided several customization options so that you can accommodate different size items, vary the style, and alter the dimensions. It goes together very quickly with a unique production technique. The organizer must be made with plywood because it would not be able to withstand the expansion and contraction associated with solid wood. |
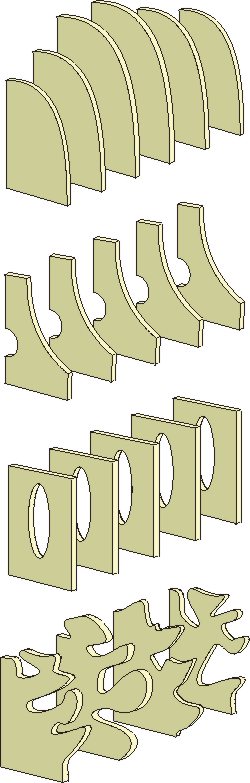
Design ConsiderationssizeWe determined the width of our organizer by measuring the shelf of a bookcase on which it will be placed; you can alter the width of the organizer drastically. The depth and height was determined by the items that we plan to store on it, namely books and catalogs. If you have an alternative use, these dimensions can be increased or decreased without much concern. Make sure that the back panel is wide enough to prevent the items you are storing from tipping backwards. If you are going to store a variety of items then the bottom of the back panel needs to be lower than the height of the shortest item you plan to store in the organizer. You can also alter the distance between the vertical panels. Remember that the purpose of the panels is to provide rigidity to the entire piece and also to ensure that items stored in the organizer remain in a vertical orientation. If you will be storing files on the organizer, you may want to minimize the dimension between the vertical panels; with heavy books that don't tend to tip over, you can increase the dimension. Anything less than 4" (10cm) will be difficult to apply finish and anything more than 12" (30cm) or 16" (40cm) will be weaker. The number of vertical panels you use should be determined by what you will store on it. If you need lots of support you should have more panels. Note that if you choose to use vertical patterns with gradually changing shape, the effect works best with many panels. See the following 'shape' section for more on this topic. shapeIn addition to altering the overall dimensions of the organizer, you can also change the shape of the panels. In the plan above, we used plain rectangles for the bottom and back panels and simple trapezoids for the vertical panels. Since the bottom panel will be supporting all of the items that you store in the organizer we recommend that you maintain the rectangular bottom panel; The vertical panels and back panels, however, can be redesigned. We have included some ideas in the margin shown without the bottom and back panels so you can focus on the differences. Whatever you choose, make sure that you don't lose sight of the function: the bottom of the back panel should be lower than the top of the smallest item that you ever will store on the organizer and the side panels should be wide and tall enough to support an item that is tipped against it. Another idea is to use altering shapes for the vertical panels; or they can be of gradually changing size. If you do opt for a gradual change from one panel to the next, make sure you have a sufficient number of vertical panels so the effect works visually. You can also trim the back panel to an alternative shape. Cut the dadoes as shown in the plan and then trim to the desired shape on the band saw. The back panel will usually be hidden by the stored items so the detailing you do here will most likely go unnoticed. Also keep in mind that if you want to use a pattern-making or flush-trim bit to size the vertical panels, there needs to be enough room in the pattern for the bit itself; certain patterns with sharp inside corners do not provide enough room for the bit. We recommend that you consider what the piece will look like in actual use. When books are placed in the organizer much of the design will be out of view so keep this in mind as you decide which shape to choose. materialsPlywood is almost a requirement in this project. Solid wood expands and contracts with weather changes and the fixed distance between the dads does not allow for this wood movement. Since plywood is a lamination of thin layers of wood in alternating grain directions, the expansion and contractions becomes negligible. You can choose between a wide variety of plywoods, but since the edges are exposed (unless you edgeband them), you will probably want to choose a variety that uses the same type of wood for the core as well as the faces. You will also want to ensure that the core is free of voids so unsightly gaps will not be visible on the exposed edges. The thickness of the plywood can be increased but we have found that the organizer can look too bulky if you go too thick. Thinner plywood would be acceptable for small organizers but would be flimsy for larger ones. |
 |
|
© 2000-2008
terms privacy policy |
home gallery |
| projects philosophy faq | ||