
|
home gallery |
| projects philosophy faq | |
 |
free plans: how to make a Vertical Organizer |
| Basic Description |
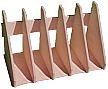
This simple organizer neatly stores papers, files, books, magazines, catalogs etc. We have provided several customization options so that you can accommodate different size items, vary the style, and alter the dimensions. It goes together very quickly with a unique production technique. The organizer must be made with plywood because it would not be able to withstand the expansion and contraction associated with solid wood. |
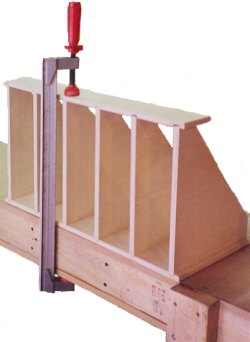
Now we are ready for final assembly and finishing. If you have a brad nailer, you can complete the assembly all at once: simply nail everything together after applying glue. If you are using a hammer and nail set, we recommend doing it in two steps as we will describe below. Glue the bottom by applying wood glue to both surfaces (the vertical panels and the dadoes). To clamp, use the back panel as a caul (see photo to the right); this provides a flat surface to clamp on and it yields the proper alignment to the panels. Wait until the glue gets gummy, approximately 30 minutes to one hour and remove any squeeze-out. Once the glue is dry, you can glue the dadoes in the back panel and tap in brads [Item #4]. Its best to glue both surfaces so you should mark where the back panel will be attached so you know where to apply glue on the vertical panels. Let the glue set and remove any squeeze-out as before. |
 |
Complete any necessary final sanding, and apply finish. You can use a stain and follow with a polyurethane. Regardless of what you use, follow the manufacturer's directions. We used three coats of antique oil which is an oil/ varnish blend consisting of mineral spirits, oil, and a spar varnish. For more information regarding finishing, consider Understanding Wood Finishing by Bob Flexner. |
 |
|
© 2000-2008
terms privacy policy |
home gallery |
| projects philosophy faq | ||