
|
home gallery |
| projects philosophy faq | |
 |
free plans: how to make a Wall Mirror |
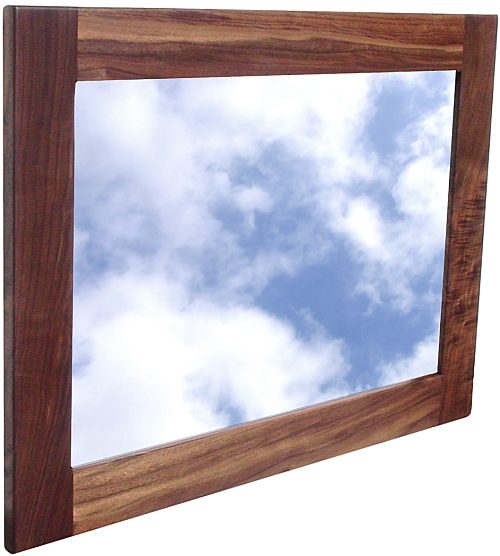
| Basic Description | Here is a free plan for a framed wall mirror that uses mortise and tenon joinery. You can use the same technique described below to display photographs or paintings. This project requires a relatively small amount of wood and with sufficient sanding and proper finishing, you can achieve a fantastic wall hanging that will make your room appear bigger and more airy. |
We sanded with 100 and 120 grit paper and then routed all edges with a roundover bit and then continued sanding with 180, 220, 320 and 400 grits. Once the frame has been sanded, it is ready for a finish. You should complete the finishing before you proceed with the weaving. You can use a stain and follow with a polyurethane. We used antique oil which is an oil/ varnish blend consisting of mineral spirits, oil, and a spar varnish. After wiping on with a brush and waiting for about 5 to 10 minutes, we wiped of the excess with a clean rag. We let it dry overnight and repeated this process two more times. For more information regarding finishing, consider Understanding Wood Finishing by Bob Flexner. Once the finish has dried, you can insert a mirror. Have the glass shop cut it to about 1/8" (3mm) undersized in both the length and width. Cut a backer board to be mounted behind the mirror, it can be either hardboard or cardboard. This will protect the mirror from being scratched from behind. You can mount the mirror and backer board to the frame using glazier's points or similar hardware. Finally, you simply need to attach some hanging hardware: you can use clips or wire that is used to hang paintings; these are available at most hardware stores. |
 |
|
© 2000-2008
terms privacy policy |
home gallery |
| projects philosophy faq | ||