
|
home gallery |
| projects philosophy faq | |
 |
free plans: how to make a Curved Photo Stand |
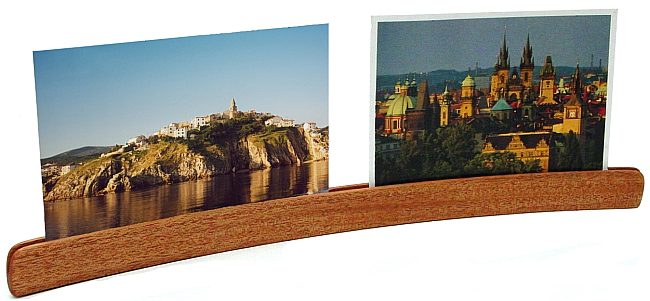
| Basic Description | This curvaceous sliver of wood is assembled from a set of thin strips; it can be used to display photos, cards and notes. The sinuous curve is much more than a design element: it provides stability and increases the rigidity of whatever you hold with the central groove. These 'curved photo stands' make great gifts, and they can easily be made out of leftover material. |
design considerations |
|
materialYou can use any wood you choose so long as it is flexible enough to bend into a sufficient arc. You could also use varying types of wood for the strips giving a striped pattern. If you do use different species of wood, it is probably best for the outside two strips to be the same type; you don't want the photo stand to warp as the wood expands and contracts. sizeThere isn't a size requirement; the most important aspect is to create a great enough arc (small radius) so that the photo stand has a large footprint and therefore remains stable. As long as the photo stand curves enough, the size doesn't matter. The thickness of the strips should be determined by the flexibility - if the strips are too thick they will snap when you clamp them. The groove needs to be wide enough to accept photographs or cards, but it shouldn't be too wide or the photographs will not be held sufficiently. As described in the plan, we recommend about 1/16" (2mm) |
|
other ideasYou can make various profiles in the ends of the curved photo stand. Another alternative is to use more than 3 strips. Using 5 strips you could create 2 parallel grooves that would accommodate for 2 rows of overlapping photos and/or cards. The central strip can be cut in a way that caps off the ends of the groove - it can also be cut to make divisions along the groove. |
|
© 2000-2008
terms privacy policy |
home gallery |
| projects philosophy faq | ||