
|
home gallery |
| projects philosophy faq | |
 |
free plans: how to make a Computer Monitor Shelf |
| Basic Description | The space around one's computer is often particularly valuable. At uniqueprojects, we are consistently battling with the clutter on and around our computers; below you will find one of the remedies we designed for the problem. It's a simple plan for a shelf that fits on top of most computer monitors. The shelf can be used to hold all sorts of items: picture frames, notes, papers, and lightweight peripherals (such as computer speakers, small scanners etc.) In the end, this project allows you to convert wasted space into highly usable space. |
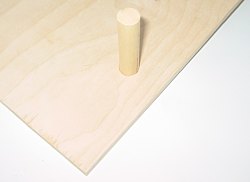
Next we need to cut the dowels to the proper length. To calculate the length of the two dowels, start with the measurement that you took in the previous step (the gap between the bottom of the shelf and the top rear of the monitor) and add the depth of the holes that you drilled. Finally subtract the thickness of the bottom of the tip caps that will be used. We had a 2 1/2" (63mm) gap, and added 1/4" (6mm) for the depth of the hole, and subtracted 1/8" (3mm) for a total dowel length of 2 5/8" (66mm). Cut two of these dowels and glue them into the holes that you created in the previous step. We used polyurethane glue because it works better on endgrain than ordinary woodworking glue. Epoxy glues would also work well. |
 |
|
© 2000-2008
terms privacy policy |
home gallery |
| projects philosophy faq | ||