
|
home gallery |
| projects philosophy faq | |
 |
free plans: how to make a Wine Rack |
| Basic Description | Since most wine gets better with age, wine enthusiasts need a method to store their bottles. Below you
will find a free plan for a remarkably simple wall-mounted bottle storage rack that attractively displays
your collection. We describe several layouts to maximize
the use of available wall space. The design employs efficient use of materials; you won't believe that
you can securely hold so many bottles with so little wood. |
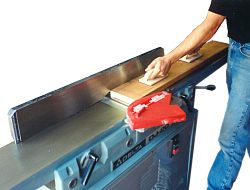
We will start by preparing the wood. If you are surfacing rough lumber, then you will have to follow the basic steps of surfacing. If you are using surfaced lumber you can omit this step. We used a 39" (1m) long piece of rough cherry and jointed a face until it was flat. As always, ensure that your board is free from any nails or staples to save your jointer blades. Position the concave side down. |
 |
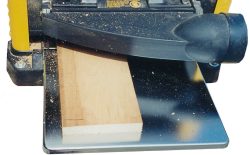
Next, plane the opposing face so that it parallel to the first side. Make several passes removing a small amount of material each time until you reach a point where the entire rough surface has been removed. |
 |
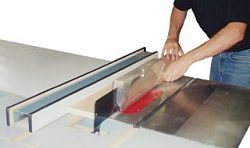
Joint one of the edges by performing several passes until it is flat. Lastly, rip the remaining edge with the table saw. You don't have to worry about the ends of the board because you can trim them after you finish the upcoming cuts. |
 |
|
© 2000-2008
terms privacy policy |
home gallery |
| projects philosophy faq | ||