
|
home gallery |
| projects philosophy faq | |
 |
free plans: how to make a Pop Up Origami Card |
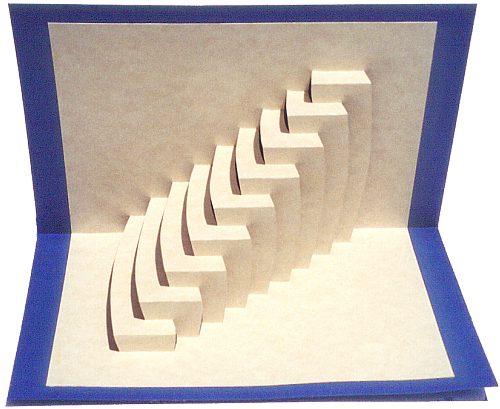
| Basic Description | It has been known for centuries that if you cut and fold paper in just the right manner, you can achieve amazing and beautiful results. Below, we have provided simple instructions on how to make an interesting origami card with a couple of sheets of paper. It will require some patience but it is definitely fun and interesting! |
Let's begin by printing out the pattern. Once you create this card, you will be able to experiment with all sorts of related ideas. Click on the icon on the right to view the actual-sized pattern and print it out on the sheet of paper that you have chosen. We strongly recommend against using ordinary writing paper because it makes the project much more difficult and doesn't seem to offer any benefits. Medium weight paper is ideal: the weight should fall somewhere between standard writing paper and heavier cardstock. |
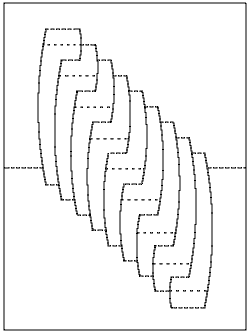 |
Notice that there are three different types of lines on the pattern. The solid lines represent lines that should be cut. The two different types of dashed lines represent the two different types of fold direction that you will need to perform: one represents 'valley' folds and the other 'ridge' folds. Keep in mind that the side that is printed will serve as the back of the card so that the printed lines will not be visible. |
|
© 2000-2008
terms privacy policy |
home gallery |
| projects philosophy faq | ||