
|
home gallery |
| projects philosophy faq | |
 |
free plans: how to make a Curved Photo Stand |
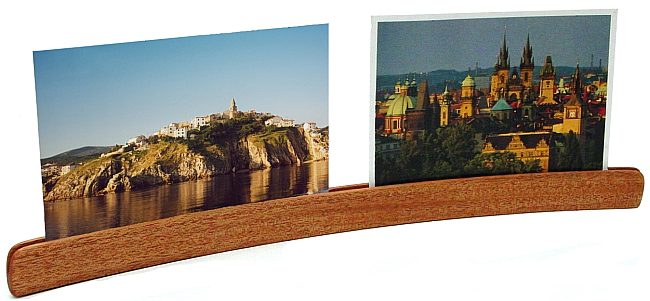
| Basic Description | This curvaceous sliver of wood is assembled from a set of thin strips; it can be used to display photos, cards and notes. The sinuous curve is much more than a design element: it provides stability and increases the rigidity of whatever you hold with the central groove. These 'curved photo stands' make great gifts, and they can easily be made out of leftover material. |
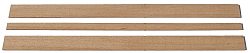
Now that you have all of the tools and materials, we can jump right into the project. Let's start by preparing the wood for the project. We started with one leftover piece of rough mahogany and surfaced the faces and edges. If you are using previously surfaced lumber, you won't need to do any surfacing. Next rip the wood into two thin strips about 1/8" (3mm) wide. If the wood you are using is particularly hard (and therefore won't bend easily), you should make slightly narrower strips. Rip a third strip between 1/16" to 3/32" (2 - 3mm). |
|
|
© 2000-2008
terms privacy policy |
home gallery |
| projects philosophy faq | ||