 |
home gallery |
| projects philosophy faq | |
 |
free plans: how to make a Perpetual Calendar |
| Basic Description |
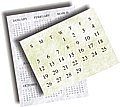
This is an amazing calendar that remains functional for thousands of years. We have three versions: the first is an online version intended for online viewing and printing of selected pages. The year-at-a-glance version uses fourteen ordinary sheets of paper and extends from the year 1600 to 10000. Our favorite is the monthly version that spans 2800 years and fits on 28 sheets of paper. If you used traditional wall calendars during that period, you would need at least 30,000 sheets of paper! Don't worry these aren't microscopic: the pages are full-size. |
| Materials | Paper |
Now you need to test the printing of the calendar of your choice. We are providing this test to ensure that the acrobat files are printing properly on your system and to show you how to orient the pages properly in your printer. To do this, you will need the Acrobat Reader installed on your computer. If you do not have the reader, you will need to install the free program before proceeding. We offer each calendar in two paper sizes (letter and A4). Each paper size has two files, one for the fronts of the page and one for the backs. After printing one side of the paper, you will need to place the paper the opposite way into your printer, but make sure that top of the printed side is closer to the printer. |
 |
Letter paper:
A4 paper:
If you are having any difficulties with the download or printout, you should visit the Acrobat troubleshooting page. Make sure that you didn't print the two files on the same side of the paper. If so, you need to flip the sheet over before printing the back side. Now, look at both sides of the sheet: the orientation arrows should be pointing in the same direction. Also check the quality of the print. The numbers should be crisp and the background should be white. If the orientation matches and the print looks good, make a mental note of how you oriented the paper into the printer and you're ready to move on.
 |
© 2000-2008
terms privacy policy |
home gallery |
| projects philosophy faq | ||