free plans  home    gallery
 projects    philosophy    faq


homemade paper
magnify2
free plans: how to make
Paper
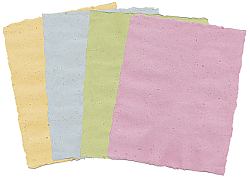
Basic Description Paper is a part of our everyday lives, but few of us know much about how it is made. It turns out that making paper is not particularly difficult, especially if you use old paper scraps as your base. With a little practise and a few tools, you can learn to make beautiful homemade papers that can be used for notes, cards or gift wrap.


step:                 review  


Design Considerations


  • size of paper: The size of your paper will be determined by the size of your frame. A larger frame, of course, requires a larger tub and is slightly more difficult to work with. We recommend starting with a standard size first before progressing to larger sheets.

  • colors: The color of your paper is based on the color of your scraps. Printed color scraps do not provide too much dye for the paper sheets: you should rely on colored paper scraps to create colored paper. You can also mix colors to create blends. Another idea is to add the pulp to the basin with a temporary barrier right in the middle. Add different color pulps to the two sides and gently remove the barrier at the last moment before lifting the frame. With some practise you can create multi-colored paper!

  • additions: You can also include additional items to your paper. Small visible pieces of paper add visual interest to the sheets. We made some very interesting paper by adding some regular newspaper scraps to the blender and blending for just a few seconds until there were pieces as small as a typed letter or two; those letters show up in the final product and are very unique. You can also add, small flower petals, tiny leaves, dryer lint, or threads; simply toss them into your basin just before gathering the pulp with the frame.
  • home made paper


    ◄ step 6


    free plans © 2000-2008
    terms   privacy policy
     home    gallery
     projects    philosophy    faq