
|
home projects suggestions |
| philosophy faq | |
 |
free plans: how to make a Yo Yo |
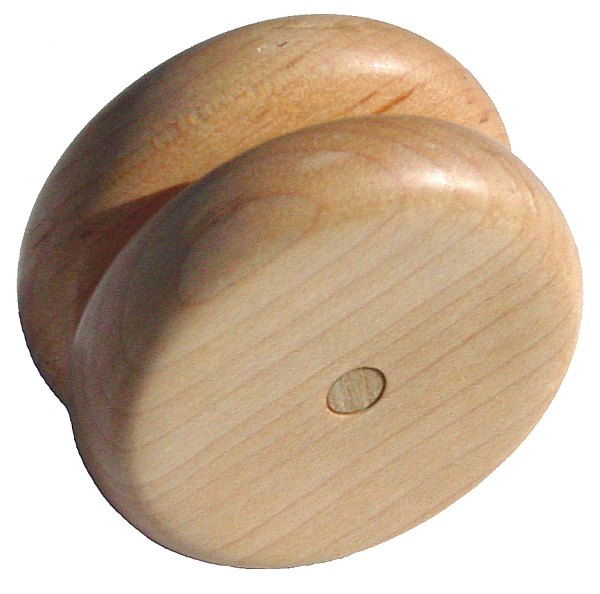
| Basic Description | Here is a great example of the power of doing it yourself. Despite also owning a few high-tech yo-yos, this homemade yo-yo is the one I use most often. The size and shape are all custom fit to my hand. Most importantly, the fact that I made it incorporates a level of satisfaction to yo-yoing that a manufactured yo-yo cannot match. This is a simple and classic project that also makes a great gift, and you won't believe the functionality that you can create. |
Next we need to complete the axle. If your drill bit was undersized (most drill bits are not exactly what they claim to be), they you can use a 1/4" (6mm) hardwood dowel providing that it is not undersized as well. You want the axle to have to be pressed into the holes in the yo-yo discs. If they can be slid in with hand strength then they are definitely too small. The best thing to do is to choose a larger diameter dowel and sand it down to the desired size. We cut a 5/16" (7mm) diameter dowel to about 4" (10cm) long (to make two yo-yo axles). Clamp this dowel into the drill press chuck and using a coarse sandpaper (we used 100 grit), evenly sand the dowel. Resist the temptation of wrapping the sandpaper around the dowel: just place it on one edge as you did in step 6. Stop at the point when you are almost able to slide a yo-yo disc onto the dowel. If you have a vernier, the dowel should be about .01" (.25mm) larger than the hole. Once you have sanded the dowel to the correct diameter, let's cut it to the proper length. The length should be the width of the two yo-yo discs plus 3/32 of an inch (2.5mm). Stack the two yo-yo discs on a flat surface, and measure both of them together to accomplish this. The 3/32" (2.5mm) is the desired gap between the two discs. You should cut off some of the end of the dowel because it tends to get a little more sanding than the rest of the dowel and thus has a slightly narrower diameter. Mark the desired length and cut it on the bandsaw, slightly oversized. Then sand the ends down on the disc sander to achieve the proper length. Remember not to keep the dowel in contact with the sander for more than a short moment -- doing so will burn the dowel. You can also sand a small chamfer on both ends of the dowel to make it easier to insert the dowel into the holes. |
|
© 2000-2008
terms privacy policy |
home gallery |
| projects philosophy faq | ||