
|
home projects suggestions |
| philosophy faq | |
 |
free plans: how to make a Yo Yo |
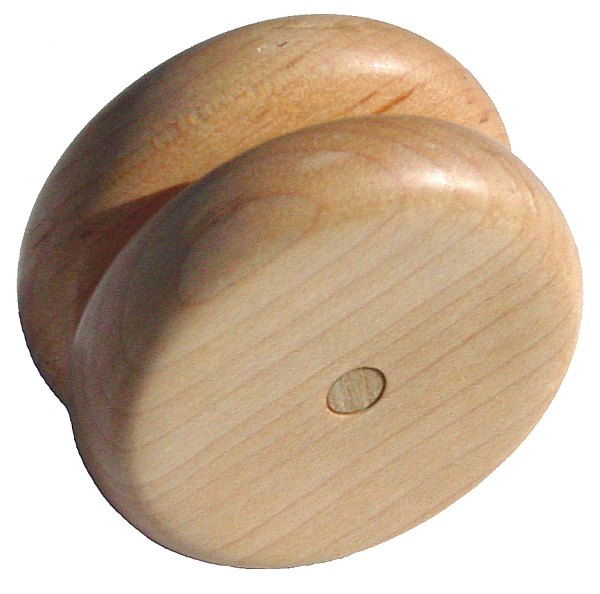
| Basic Description | Here is a great example of the power of doing it yourself. Despite also owning a few high-tech yo-yos, this homemade yo-yo is the one I use most often. The size and shape are all custom fit to my hand. Most importantly, the fact that I made it incorporates a level of satisfaction to yo-yoing that a manufactured yo-yo cannot match. This is a simple and classic project that also makes a great gift, and you won't believe the functionality that you can create. |
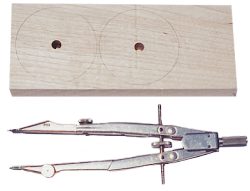
Next, mark the circles: you will need two for each yo-yo that you are making. Use a compass to carefully draw the circles and make sure that a clear mark is left in the middle of the circle: you will need this when you are drilling the holes for the axle. We used a diameter of 2 3/8" (6cm) but you can increase or decrease this as desired. Try a very large one and a very small one and see what happens. Note that you can make different test yo-yos without sanding and finishing to determine the best size for your hand. Such a yo-yo can be made in a very short period of time. |
 |
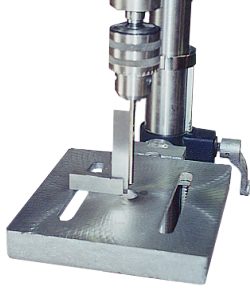
Before cutting the discs, this is a good time to drill the holes because it is easier to hold the workpiece at this stage since it is larger. Make sure that the drill press table is square to the chuck. We used a straight steel shaft and a small square as shown in the picture on the right. A perpendicular hole is critical for proper functioning of the yo-yo so do not attempt to make the holes with a hand drill unless you have a portable drill press fixture. Check for perpendicularity in several planes, not just on side. Make sure that you put a piece of flat scrap wood beneath the wood you are drilling so that you do not get any tearout when the drill bit penetrates through. Drill a through hole precisely where the mark is left from the compass to ensure that it is properly centered. |
 |
|
© 2000-2008
terms privacy policy |
home gallery |
| projects philosophy faq | ||