
|
home gallery |
| projects philosophy faq | |
 |
free plans: how to make a Pop Up Origami Card |
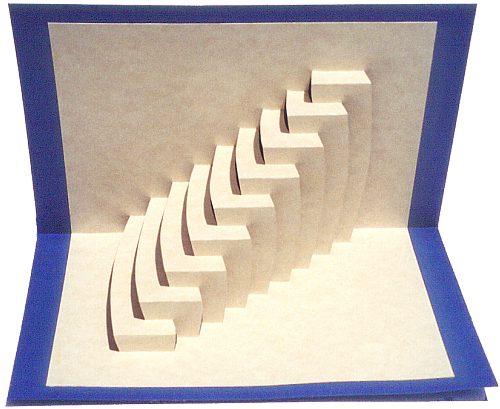
| Basic Description | It has been known for centuries that if you cut and fold paper in just the right manner, you can achieve amazing and beautiful results. Below, we have provided simple instructions on how to make an interesting origami card with a couple of sheets of paper. It will require some patience but it is definitely fun and interesting! |
Next, take the sheet of heavier paper, and gently score a line in the middle and fold it in half. Insert the sheet that you have been working on and confirm that it fits into place. Apply paper glue to the back side of the origami sheet wherever it comes in contact with the card. We simply spread white glue with our finger. Apply a small amount of glue so that the it doesn't squeeze out and become visible. Carefully place the origami sheet into the heavier card and then put the assembly within the pages of a heavy book until the glue dries. We like to trim the perimeter of the card after drying and while the card is in a closed position: this ensures that all the corners line up properly when the card is closed. |
 |
|
© 2000-2008
terms privacy policy |
home gallery |
| projects philosophy faq | ||