 |
free plans: how to make a
Magazine Holder |
| Basic Description |
This holder will organize your magazines in a simple and elegant way. A hanging pouch neatly
holds your reading material so that it is off the table, but always within easy reach. The
fabric is easily removable for cleaning and the whole project goes together rather quickly. You can
customize the look to compliment your decor or add extra tiers for increased capacity. |
Now you need to sand. While you are on the lower grits, we suggest that
you round over every single edge in the project: the cutouts that will receive the back panel, the
rear side of the side panels, even the corners of the grooves that accept the dowels. This rounding
over gives a handmade touch to the piece. We sanded using the following sandpaper grits:
100, 120, 150, 180, 240, 320, 400. |
 |
Once the sanding is complete, you are ready for assembly.
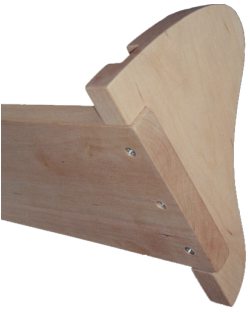
Begin the assembly by predrilling some holes for screws through the back panel and into the side
panels. We like to make the ends of the back panel to stick out just a bit so that it is proud. An 1/8" or 1/4" (3 - 6mm)
satisfies us. We used two screws on each side. You will need to creatively clamp the pieces in a
vice but you should be able to figure it out. Now you can glue up the back panel into the side panels.
and immediately drive the screws. These redundant fastening methods will ensure that your magazine
holder will have a long life even if it is handled roughly. The screws prevent the need to clamp
the project together during drying.
|
