
|
home gallery |
| projects philosophy faq | |
 |
free plans: how to make a Curvy Stripe |
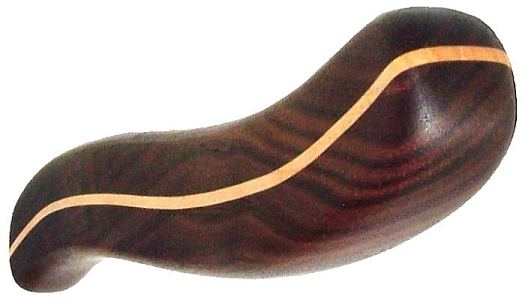
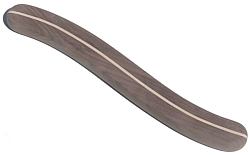
| Basic Description | In the free plan below, we illustrate a technique that that shows you how to incorporate a narrow stripe into almost any wood project. You begin with your primary wood, cut a curve, and then glue a thin sliver of a contrasting wood between. The result is a beautiful detail can be used to add sinuous curves to pulls, box tops, drawer fronts, table tops etc. |
If you are using this technique to create a stripe in a piece of wood to be incorporated into another project, then you can perform the sanding and finishing whenever that project requires it. We made some additional bandsaw cuts to the board, and then routed a roundover to all edges creating a rather intriguing shape. Next, we performed all the requisite sanding: we sanded with 100, 120, 150, 180, 220, 320 and 400 grits. After sanding, it is ready for a finish. You can use a stain and follow with a polyurethane. We used antique oil which is an oil/ varnish blend consisting of mineral spirits, oil, and a spar varnish. After wiping on with a brush and waiting for about 5 to 10 minutes, we wiped of the excess with a clean rag. Make sure you wipe away any excess finish in the groove so that there isn't any interference with the photos that will be inserted. We let it dry overnight and repeated this process two more times. For more information regarding finishing, consider Understanding Wood Finishing by Bob Flexner. |
 |
|
© 2000-2008
terms privacy policy |
home gallery |
| projects philosophy faq | ||