 |
free plans: how to make a
Bulletin Board |
| Basic Description |
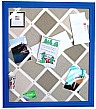
Here is an elegant bulletin board that can hold messages, notes, letters and photographs. It acts
just like a tack-board, but you don't have to fumble around with push-pins and we think that you
will agree that it looks much
better. You can customize the colors and the dimension to create a project that fits into
its surroundings. |
Additions to the Bulletin Board
frame
It is easy to add a frame to the bulletin board. We simply purchased
some pre-primed pine molding and routed a rabbet into the corner. The molding we used is about
2" (5cm) wide and 5/8" (16mm) thick: We made the rabbet about 5/8" (16mm) wide and about 7/16" (11mm) deep. This rabbet
will be placed right onto the corners of the bulletin board. Using a miter box saw cut the pieces to fit your
bulletin board, and then paint them before proceeding. While you have the paint out
you may want to paint the heads of a set of tacks that will be used for the intersections of the ribbons:
this will aesthetically associate two of the elements of the project. |
 |
Once the paint is dry, attach the frame to the bulletin board with short
brads and hit them into place with a nail set. You can fill the holes and any gaps at the joints,
with some wood filler, and after it dries, you can touch up the frame with some paint. As
shown in the image on the right, we chose a color for the frame that matched another color in the
room to tie the decor together. |
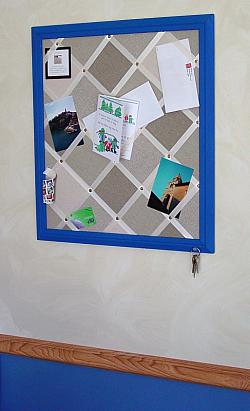 |
hooks
As shown in the image on the right, you can add hooks to the
bottom and/or sides of the bulletin board to hold keys etc.
|
You can attach a sheet of cork to the wood below the fabric. With
this addition, you would be able to use the ribbons as well regular tacks to hold your papers.
Cork can be purchased in sheet form at many hardware stores and it can be affixed to the wood
with spray adhesive. Wrap the fabric over the cork as described in the plan above. If you use
cork, note that ordinary
thumb tacks will not work well at the intersections of the ribbon; we want the tacks to penetrate
into the wood so that they are firm. You will have to find extra long tacks that will reach
through the cork and into the wood - these
are available but not particularly easy to find.
|
The bulletin that we show in the plan is just a basic version; there are many
options and embellishments that you can include.
|
fabric
You can use any fabric you like but it should be durable. If
you are using cork behind the fabric as described above, you should choose and open-weave fabric so that the
tacks do not leave visible holes. If you are not using cork, you can choose virtually any
fabric because you will not be using tacks. |
|
size
This bulletin board can be made to any size. You could use an entire
sheet of plywood if you like, as long as you have a piece of fabric big enough to cover it. Of
course if you choose something so large, you will need to attach it to a wall in a very secure
manner.
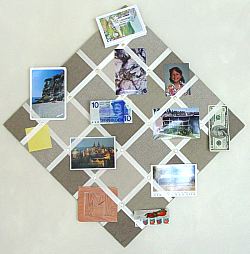
other ideas
You can position the ribbon parallel to the edges of the plywood as opposed to a 45 degree angle. Then
you could mount the entire board on the wall at a 45 degree angle in a diamond shape. This would
give a very dynamic look and would be easy to create. If you do this, you should probably use
the same dimension for the length and width of the plywood so that it doesn't look lopsided, unless
that is the look you are after.
|
 |

