 |
free plans: how to make a
Mobile Workstand |
Basic Description
|
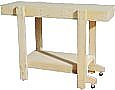
This simple workstand is both stable and mobile. It provides a great surface for cutting,
routing, sanding, assembly etc. You can roll it around your workspace
by simply tipping one end a few degrees to engage the wheels. In the resting position, the wheels
are disengaged and this is the key to its stability. There are no obstructions on the underside of
the worktop which allows for efficient clamping. These mobile workstands work very well in pairs, so after you
finish your first one, you may want to build another! |
Lets attach the four legs. Before cutting, you need to decide on the overall height of the workstand.
A good rule of thumb is to stand normally with your arms resting at your side: the bend in your wrist
is usually a good working height. If you will not be the only one using the workstand, you may opt for
a more standard height: 34 to 36" (85 - 92cm). The legs extend from the shop floor all the way to the
worktop so you only need to account for the leveling feet. We measured 34" (85cm) to the bend in the
wrist and we are allowing
about 1" (25mm) for the leveling so we are cutting four lengths of our stock wood to 33" (84cm) for the legs.
|
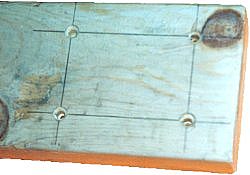 |
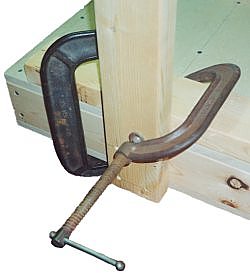
After the legs are cut, we marked one end for attachment to the worktop. See the photo on
the right (note that we are showing two different clamping techniques - one for those who don't have
longer bar clamps and the other for those that do). You will want to ensure that the screws will drive into the frame of the worktop and not
the edges of the panels so don't forget to account for this in when marking the location for the holes.
Make through or clearance holes through the leg and pilot holes in the worktop.
|
 |
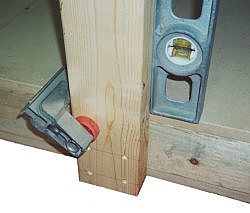
Once all the holes are drilled, you can position the legs into place. Lay the worktop on
the ground with the less-desirable side pointing upward (this will be the underside of the worktop). Position the leg by the
first crossmember from the end. Your screw wont reach the crossmember, but the crossmember
gives added stability to this area which makes it a suitable place to attach the leg. Make sure that
the top of the leg is flush with the top of the worktop: you can always grind it down if it is too high,
but if it is too low you will lose out on some of the functionality that the external leg provides. Next clamp the leg in place, and use square or level to make sure that it is perpendicular to the worktop.
Finally, drive in the heavy wood screws.
|
 |
