
|
home gallery |
| projects philosophy faq | |
 |
free plans: how to make a Vertical Wine Rack |
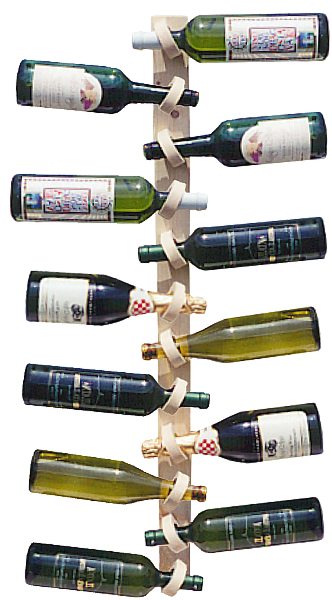
| Basic Description | Here's a free plan for a remarkably simple wall-mounted wine-bottle storage rack that makes for an attractive display. The design of the wine rack holds the bottles in a cantilevered position and employs a minimal use of materials. You can group several of these holders made to the length of your choice to hold anywhere from a few bottles to an extensive collection. In addition to wine, this holder is equipped to hold other bottles such as fine sauces or balsamic vinegar. |
| Materials | wood, screws, paint and primer. A complete material list is provided below. |
| Tools | table saw, bandsaw or jigsaw or scrollsaw, disc sander, hand drill or drill press. A complete tool list is provided below. |
| Cost | The plan itself is free! Estimated cost of materials: $6 |
| Time | 4 hours |
| Difficulty | Moderate |
| Legal Notice | Use of this website constitutes acceptance of our terms of service policy. |
| Similar Projects | Compare this plan to that for our original wine rack. |

The first step involves acquiring the necessary materials and proper tools. It is best to get everything prepared before commencing because you become free to progress without unnecessary interruptions. We recommend that you read through the entire plan and especially the design considerations section before acquiring/assembling all of the requisite tools and materials. There are several options with this project, and it is most prudent to be fully informed of them before making design decisions. |
| Item | Qty. | Description |
| #1 | varies | wood. amount varies based on size of rack you choose to make. with a board 3/4" x 3" x 60" (20 x 150 x 1500mm) you can make a rack that hold 10 bottles. we used pine which is very soft and easy to work with; for added durability it is better to use a harder wood such as poplar. |
| #2 | - | paint and primer |
| #3 | 3 or 4 per rack | mounting screws (length and type vary dependent on the wall you are mounting to). refer to the design considerations section at the end of this plan for more details. |
| #4 | 2 per loop | flathead wood screws. since we had ten loops on the model we made, we required 2 wood screws. if you are using 3/4" (19mm) thick wood, the screws should be about 1 1/2" (38mm). |
| Tool |
table saw  |
| drill or drill press and 1 1/2" (38mm) diameter drill bit |
| bandsaw , jigsaw or scrollsaw |
| sandpaper |
| disc sander |
| C-clamp |
| small paintbrush |
|
© 2000-2008
terms privacy policy |
home gallery |
| projects philosophy faq | ||