
|
home gallery |
| projects philosophy faq | |
 |
free plans: how to make a Welding Table |
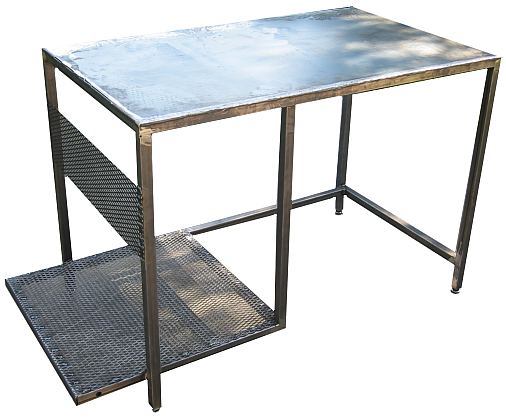
| Basic Description | Here is a straightforward plan to make a steel table perfect for welding or other metalworking needs. It is very sturdy and the undershelf can hold your welder, supplies, and any shielding gas that you may need. In the review section of the plan, we also show how you can add a couple of wheels to make this a mobile welding station. |
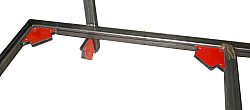
We started the table by working on the frame. The frame for the table top is a good place to start. Cut four pieces with 45 degree angles and assemble them into a rectangular frame. A set of 90 degree magnetic clamps are ideal for holding all the pieces in their proper position. Weld the frame pieces together on a flat surface - if the surface isn't flat, it will be difficult to make a flat tabletop. We performed all the welding on our shop floor which is made of concrete. We sized our frame to be slightly larger than the sheet metal that will be used for the top surface. This prevents any of the sheet metal extending beyond the frame which could be dangerous. |
 |
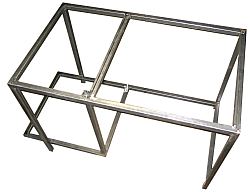
Continue cutting and welding to make the basic frame. We have provided a layout of the welding frame for your reference; printing this layout will be helpful during the construction of the frame. Notice the additional crossmember on the frame to support the tabletop; this provides additional strength to the top and provides a larger welding area to support the vertical undershelf support. After the frame for the top is complete, we worked on the legs and then the undershelf. Note that the undershelf extends beyond the edge of the table; this allows room for tall gas tanks and also provides a place to mount wheels if mobility is desired. See the design considerations section at the end of this plan for details on converting this into a mobile welding table. Note that the undershelf fits inside the legs of the table; this minimizes the amount of required welding and makes for a very strong table. The vertical undershelf support is the only part of the frame that has an exposed end, but the table top will cover the opening in the next step. |
 |
|
© 2000-2008
terms privacy policy |
home gallery |
| projects philosophy faq | ||