 |
free plans: how to make a
Walnut Shell Case |
| Basic Description |
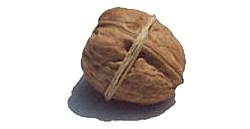
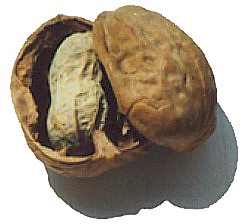
This walnut shell case secretly houses a small gift, note, or poem. As we describe
in the plan below, you simply crack open an inshell (or whole) walnut, remove the nut meat, insert a small
item and glue the shell back together. Surprisingly, with a little care and practice, you can create
a secretive walnut case that looks and feels like a completely unaltered walnut. This makes for an intriguing
gift or party favor and is perhaps best given along with a nutcracker. Read on for a thorough description and several ideas. |
| Materials |
Inshell (whole) walnuts, super-glue, twine or ribbon. A complete
material list is provided below. |
| Tools |
Hammer or nutcracker.
A complete tool list is provided below. |
| Cost |
The plan itself is free! Estimated cost of materials: $5 |
| Time |
30 minutes |
| Difficulty |
Easy |
| Legal Notice |
Use of this website constitutes acceptance of our terms of service policy. |
Let's start by cracking open some walnuts. Opening walnuts is not particularly difficult,
but for this project, we need to open them cleanly. It is not critical that we crack the
nuts along the border between the two halves, although it is a convenient place for the break.
The goal is simply to split the shell into two pieces without damaging any other parts of the shell.
Unfortunately, there is no foolproof way to accomplish this.
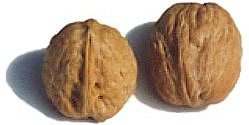
It turns out that not all walnuts are the same. The easiest way to crack open
walnuts is to find suitable walnuts. It seems that older (less fresh) walnuts do best, in fact
we just acquired some walnuts that we were able to open simply by twisting the halves apart. Younger,
fresher walnuts seem to be much harder to get into, and then not all walnuts react the same
to the various cracking techniques. The older walnuts seem to take on the smell of paint and in some
places the flavor of these older walnuts is preferred to fresh walnuts. The best thing to do is to buy more
walnuts than you need, and test a few different techniques
to find out which one works best for your batch. |
 |
nutcracker method
Using a nutcracker may seem like the most straightforward method,
but ordinary nutcrackers tend to
crush walnuts as opposed to providing the clean crack that we are striving for.
With a little practice,
though, we were able to get a reasonable success rate. The key appears to be a gradual increase in
pressure as opposed to a quick squeeze. Increase the force until you hear a crack and then determine
if the gap is sufficient enough to pry open the shell (without damaging it) with a screwdriver
or similar tool.
Prying too hard may damage the edges of the crack;
if the shell is giving too much resistance, apply a little more pressure with the nutcracker.
|
 |
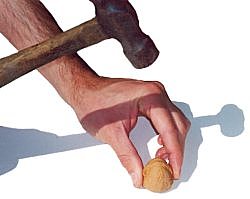
hammer method
Gentle tapping with a hammer or stone often
yields good results. Again your success will depend greatly on the batch of walnuts that you are using.
While firmly holding a walnut, gently tap on the pointed end (this seems
to work best for us). You can increase the strength of the hammer strikes until you hear the crack.
Stop immediately and assess the damage, you usually can pry open the walnut with a screwdriver; if not, strike the shell again.
vise method
A benchtop vise is able to provide a gradually increasing amount of pressure which
is well-suited to the task at hand. We have had the best results clamping the walnut from end to
end and slowly increasing the pressure until the inevitable crack.
|
 |
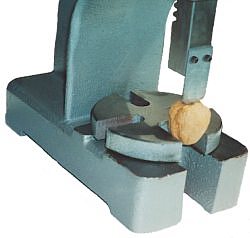
bench arbor press method
This is the most elaborate method, but it yielded the
most consistent results. Surprisingly, some bench
arbor presses are rather inexpensive, but we wouldn't invest in one unless you had a huge
batch of walnuts to crack, or have other uses for the tool. We started by cutting a strip of steel and grinded one
end to a rounded and relatively sharpened blade. You may want to experiment with alternative shaped blades.
After screwing the blade to the ram we used the setup to split the walnuts
in half. While we didn't always create cracks where we expected to, this method almost always provided
a walnut shell that we could use for this project.
The easiest way to achieve the desired cracks is to find easy-to-open walnuts, otherwise your best
bet is some trial and error. Buy several times more walnuts than you intend to use; don't worry though,
its not as if the unused and improperly cracked walnuts have to go uneaten! We tried soaking
the walnuts in water for varying lengths of time and we determined that there wasn't a significant
increase in success. One more tip: once you have the cracked shells, keep them together so you don't have a puzzle to
find out which one goes with which one (unless you enjoy the challenge). |
 |
With a little creativity, you can do many things with these
walnut shell cases. You can
insert a poem, a fortune, movie tickets, or a photo. You can also tear paper-based inserts
into several pieces that are put into separate walnut shells: the recipient will have
to piece them together. How about good luck charm, a coin, or paper money.
If a few people are sharing a special occasion, you can give a bunch of these shells and let them
alternate choosing and opening shells. Many photograph developing shops are providing photo-jigsaw-puzzle
services. You provide a photo or printed sheet and they return a jigsaw puzzle of the photograph: you can
put each individual piece in its own shell. Make sure that the pieces are small enough to fit within
your batch of walnuts! |
 |
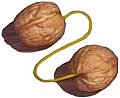
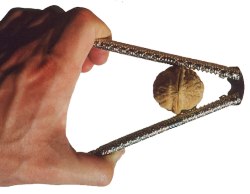
You may want to think about the significance of the act of removing a shell (becoming more open, honest and
forthcoming) and tie it in with the poem
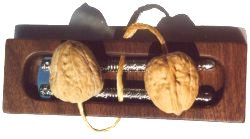
you include. We made a nutcracker holder made out of oiled walnut wood, then threaded some twine through a drilled
hole in the holder. We tied knots at each end of the twine and glued the shells around the knots with
half of a poem in each. See the image on the right.
You can give a special stuffed walnut along with a group of ordinary walnuts; the recipient
would have to try opening many of them before discovering the unique one. If you do
this you may have to experiment with putting some extra weight inside so that the embellished
walnut feels real. We have incorporated this concept into our
treasure hunt project.
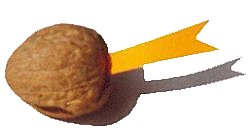
Walnut shells also make a great party favor that your guests will only discover the contents
when they return home: it can be as simple as a note reminding them of the gathering. Or for a joke, you can fit an almond or peanut inside (as shown on the right); you'll get
some surprising reactions. If you have any additional ideas, please let us know. |
 |


 or benchtop vise or bench arbor press (see step 2 for further details)