|
free plans: how to make a
Wall Clock |
| Basic Description |
Here is a free plan to create a clock built into the wall of your choice. Simple battery-operated
clock movements are inexpensive and easy to acquire. It is a relatively short process and you
can give any room a more regal look with this simple project. Note that these plans are for
installing a clock in a wall made of wallboard or drywall (brick, stone, or thick plaster walls
cannot accommodate the shaft lengths of standard clock movements). |
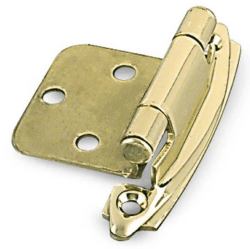
Access Door
Now you have a great-looking built-in clock on your wall but
you have an ugly hole on the other side of the wall. We highly recommend covering the hole with a
door. The simplest way to achieve this is to use a pair of self-closing flush mount cabinet hinges like the one
shown on the right. You can mount these self-closing hinges to one side of the hole. We
used machine screws and nuts with large fender washers to fasten them to the drywall; if a wall stud
is nearby, you can position the hinges right over the stud and use wood screws.
A piece of hardwood or plywood (slightly larger than your hole, of course) can act as the door. You can
use a router to provide an edge profile and paint or finish as desired. Finally, you can add a knob,
but since this door is used so infrequently, we omitted a knob.
|
 |
location of clock: We recommend positioning the clock high on a wall to
ensure that the delicate clock hands do not get damaged. Also, make sure that the access to the
clock from the wall directly behind is free of obstructions and that the wall doesn't have
electrical wiring or other interference. Remember, as stated in step 2, avoid installing a built-in
wall clock in walls that have special fire requirements (usually between garages and living
quarters): contact your local building department
if you are unsure.
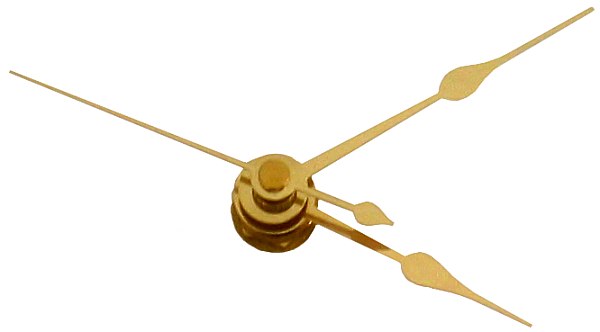
hands: The manufacturers of clock movements often offer various interchangeable
hands for your clock. Brass seems to be the standard finish, but we also saw matte black and a chrome
finish.
numbers: We chose to make a clock without numbers or marks, but
this is an area where you can get real creative. Press-on adhesive backed numerals are available. You
can also paint numbers, marks or attach objects to delineate the positions around the periphery of the
clock. Check out this unique page for some ideas: sushi clock.
|