
|
home gallery |
| projects philosophy faq | |
 |
free plans: how to make a Stamp Holder |
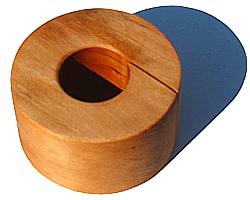
| Basic Description | Here is a plan for an incredibly simple project. The minimalist design is both fun to make and functional. It's a great project if you don't have much time or material or if you are a beginner trying to gain some experience working with wood. |
The final step is to sand all the surfaces and round off the corners. We accomplished the rounding with low grit sandpaper and proceeded to 400 grit to achieve a smooth surface. Once the sanding is complete, you are ready for finishing. In most of our project we recommend finishing oil or polyurethane, but the narrow groove is a functional surface and excess material may become a problem. For this reason we recommend using finishing oil which primarily soaks into the wood as opposed to sits on the surface. If you do use a polyurethane, for example, you will probably want to pass through the groove with your bandsaw or scrollsaw blade after the finish has dried to ensure that a clear path is maintained. For more detailed information regarding finishing, consider Understanding Wood Finishing by Bob Flexner. |
 |
|
© 2000-2008
terms privacy policy |
home gallery |
| projects philosophy faq | ||