
|
home newsletter gallery |
| projects philosophy faq | |
 |
free plans: how to make a Stamp Holder |
| Basic Description | Here is a plan for an incredibly simple project. The minimalist design is both fun to make and functional. It's a great project if you don't have much time or material or if you are a beginner trying to gain some experience working with wood. |
| Materials | Wood and finishing oil. A complete material list is provided below. |
| Tools | Bandsaw or scrollsaw or jigsaw, disc sander, sandpaper. A complete tool list is provided below. |
| Cost | The plan itself is free! Estimated cost of materials: $.50 |
| Time | 30 minutes |
| Difficulty | Easy |
| Legal Notice | Use of this website constitutes acceptance of our terms of service policy. |
| Similar Projects | If you enjoy small wood projects like this, you may also be interested in the following projects: date blocks, blockstack, impossible stack and domino effect. |
| Support This Site | Please visit our new site, CloverCaseTM for a unique CD & DVD mailer. |

The first step involves acquiring the necessary materials and proper tools. It is best to get everything prepared before commencing because you are free to progress without unnecessary interruptions. |
 |
| Item | Qty. | Description |
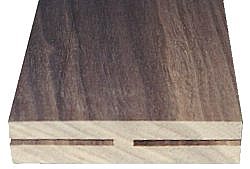
| #1 | varies | Hardwood. We used cherry about 1 1/2" x 2 1/2" x 2 1/2" (4 x 6 x 6cm); any quality wood will suffice. We made ours particularly thick to accommodate all types of stamp rolls, see the design considerations section at the end of this plan for more information regarding dimensioning. |
| #2 | - | finishing oil  |
| Tool |
| bandsaw or scrollsaw |
| sandpaper and file (recommended) |
| compas or circle template |
| drill press and 1" to 1 1/2" dia. (25 - 38mm) forstner bit. |
| disc sander |
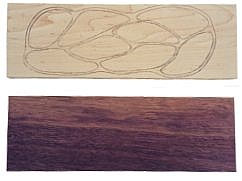
To begin, you need to prepare your hardwood. We used a piece of rough cherry that had to be jointed and planed. Make sure that you meet the minimum length requirements for your power tools. If you are using a pre-surfaced board, then you are ready to go. Mark the circle which will be the outside of the stamp holder. We used a compass to make a 2 1/2" (6cm) circle. See the design considerations section for more information regarding dimensioning. |
 |
Before cutting out the circle we just made, we drilled the central hole. The diameter should be at least 1" and preferably 1 1/4" - 1 1/2" to accommodate standard rolls of stamps. You should probably purchase a roll of stamps first to confirm the size of the roll. Note that you can compress the rolls as necessary to fit your hole, but over tightening may begin to damage the stamps. |
 |
Next, cut out the circle with a bandsaw or scrollsaw. We left a little extra material on the outside of the line and removed the material up to the line with the disk sander. You can achieve surprisingly round pieces with some patience and a careful eye. Next you can make a tangential cut from the outside diameter to the inside diameter. Try to end up at the top of the inner circle as shown in the photo on the right. Unless you are using a very thin blade, the thickness of the kerf seems to work perfectly for stamps. |
 |
The final step is to sand all the surfaces and round off the corners. We accomplished the rounding with low grit sandpaper and proceeded to 400 grit to achieve a smooth surface. Once the sanding is complete, you are ready for finishing. In most of our project we recommend finishing oil or polyurethane, but the narrow groove is a functional surface and excess material may become a problem. For this reason we recommend using finishing oil which primarily soaks into the wood as opposed to sits on the surface. If you do use a polyurethane, for example, you will probably want to pass through the groove with your bandsaw or scrollsaw blade after the finish has dried to ensure that a clear path is maintained. For more detailed information regarding finishing, consider Understanding Wood Finishing by Bob Flexner. |
 |
MaterialWe used cherry to match other desk accessories that we have, but any hardwood will suffice. Weak woods, such as pine are not recommended because they can split along the grain. If you need to use a weaker wood, make sure that the you increase the wall thickness of the stampholder. SizeWe used 1 1/2" (4cm) thick wood but you can use any thickness you like. Its probably best to size your holder to the rolls of stamps that are available in your country. A thick holder will accommodate thin stamps, but a thin holder is not well suited for a wide roll of stamps. The distance between the inside diameter and outside diameter must be sufficient to prevent splitting. There aren't too many forces on the stamp holder, but if it were to fall, for example, it needs to withstand the impact. Depending on the strength of the wood you are using, and the thickness that you choose, we recommend from a 1/2" to 3/4" (13 - 19mm) wall thickness. ShapeWe made our stamp holder round, but any shape will work. Make sure, however, that the wall thickness is not compromised. |
|
|||||||
|
© 2000-2003
terms and conditions |
home newsletter gallery |
| projects philosophy faq | ||