
|
home gallery |
| projects philosophy faq | |
 |
free plans: how to make a Shallow Box |
| Basic Description |
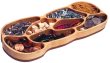
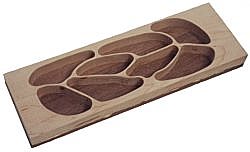
This shallow box is relatively easy to make and the unique technique allows for a very wide variety of possibilities. In the free plans below, we describe a rather complicated use of the technique but we will provide detailed instructions for many other options. Expand your boxmaking horizons beyond ordinary rectangularity! |
Now, you can glue the base and top panel together. Since they are the same size, they are very easy to align. We used plenty of clamps and melamine cauls to evenly distribute the clamping pressure and to protect the wood. We applied a very thin layer of polyurethane glue to the underside of the top panel. You can use other glues, such as yellow glue, but it will be much more difficult to remove the squeeze out. If you are using yellow glue, you shouldn't use one complete caul on the top; you will need access to remove the squeeze out about 30 minutes after gluing. If you clean up earlier the squeeze-out will be too liquid, and any later it will be very hard. Monitor the drying process and remove the yellow glue after it becomes gummy. |
 |
When the glue has dried, you can remove the cauls and any remaining glue. Polyurethane glue is much easier to remove but it is still tricky in the tight corners of the box. We used a hobby knife and tightened the blade in upside down as shown in the photo on the right. With the blade in this orientation we were able to remove the squeeze out from very difficult locations. |
 |
|
© 2000-2008
terms privacy policy |
home gallery |
| projects philosophy faq | ||