 |
Picture Frame |
| Overview |
At UNIQUEPROJECTS we focus on providing our users
with unique project plans. To keep our endeavor afloat, however,
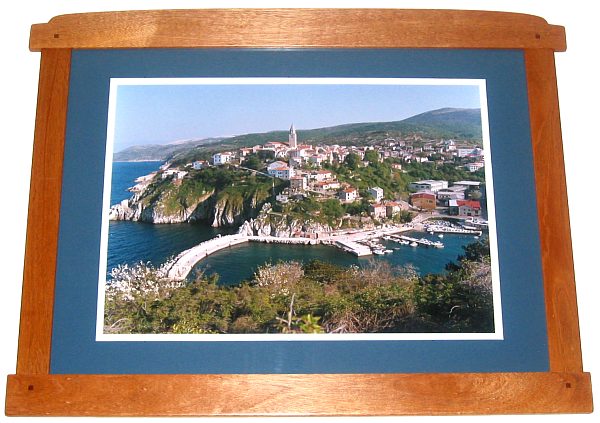
we occasionally work on other projects. Here is an overview of a large picture frame that we made for a client. |
| This is a arts and crafts style frame that I am making for the
same client to commissioned the bed that I made last year. The
design is straightforward with a few details including square pegs and a cloud lift on the top
rail. I began by
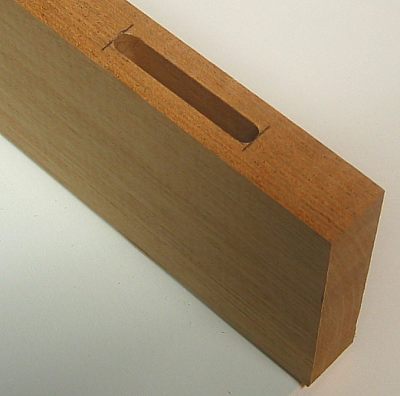
squaring all of the mahogany stock and then progressed to the mortises.
I have found that it is best to make the mortises first and then to fit the tenons to them. Using
a square, I carefully mark the beginnings and ends of the mortises. Note that the mortise width is
approximately 1/3 the thickness of the material.
|
 |
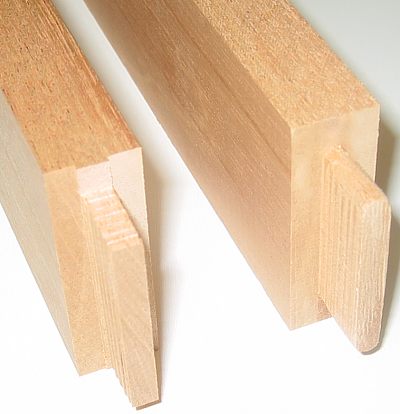
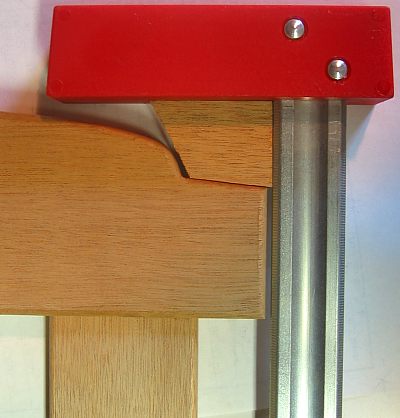
| I make tenons on a table saw with a dado set and crosscut sled.
I simply clamp a square stop to the
right of the blade; the dimension between the stop and the edge of the blade sets the length of
the tenon. Then, with repeated passes, I remove more and more material until the board
has reached the stop. Flip the board 90 degrees and repeat until you have created the tenon.
The image on the right shows two tenons. The first one is a tenon as it
looks right after using the table saw. Notice that there is a little wood left on the top (and bottom) of
the tenon; I use a chisel to remove these small tabs. This simple extra step ensures that all the pieces
will align properly. The tenon shown on the right is cleaned up: I have removed the small wood tabs
at the top and bottom of the tenon, rounded off the tenon so it will fit in the mortise, and created
a small chamfer at the end of the tenon so it will slide into the mortise easily during assembly.
|
 |
|
|
| The cloud lift detail is common in arts and crafts style
design. I marked the desired curve and cut it out on the bandsaw. I saved the scrap from
this cut for a later step. After disk sanding the curve to the final shape, I rounded over
all the edges with a 1/8" (3mm) rounding over bit on a router table.
|
 |
| I try to do as much sanding as possible before assembly because
it is much easier to sand loose pieces. After dry fitting the four pieces, and confirming that everything
was square, I glued everything up using polyurethane glue and long bar clamps. Notice the scrap
of wood that is used to match the angle of the cloud lift. I check for squareness of the frame
by measuring diagonally from one corner to the other, and comparing this dimension to its
counterpart: if they are identical, then the frame is square. Also notice that there is a reveal
with respect to the stiles and the rail. This is another common detail used in arts and crafts
design. I created this by simply planing the stiles just before edge rounding and assembly.
|
 |
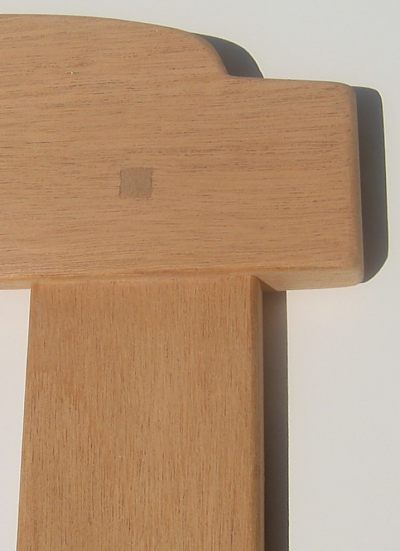
| After the glue has cured, I completed a final detail: square plugs.
I start the process by making the mortises for the plugs. The assembled frame was too large and bulky
for the mortising machine, so I made the mortises by 'hand'. First I used a hand drill to drill an undersized hole
in the desired location. Then I took a hollow chiseling mortise (without the drill in the center)
and aligned
it to the hole I just drilled and confirmed that it was not askew. A couple of taps with a
rubber mallet creates a nice square hole. I clean out the rest of the mortise alternating
between a hand chisel and a few more taps on the hollow chiseling mortise. For the plugs, I simply cut
slightly oversized plugs with a bandsaw, and then sand slight tapers on the edges so the plug lightly
compresses into the mortise - this makes for a great fit. The client requested flush plugs so after
the glue dried, I cut them with a flush cut saw and sanded until flush. |
 |
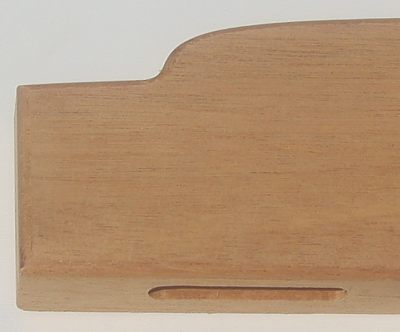
| Next I created a rabbet for the clear plastic sheet,
matboard and photograph that will be displayed in this frame. I routed the rabbet on a router
table and I will leave the corners of the rabbet rounded; note that these can easily be squared off
with a chisel. If you leave the rabbet rounded, the matboard and plastic will also have to be rounded, but
I think this is a detail that the client will appreciate. After final sanding, I coated the frame
with three coats of antique oil.
|
 |
|
|
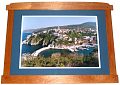
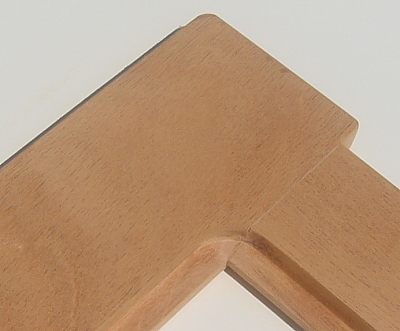
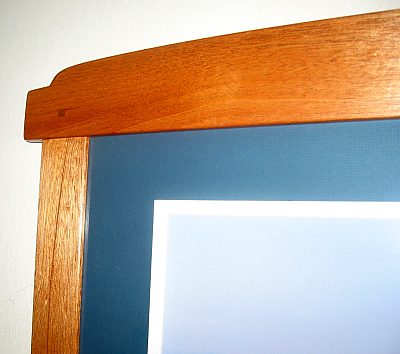
| Here is a detail view of the upper left corner of the frame. Antique oil gives
the wood a beautiful lustre that the photographs do not seem to capture. I used two mat boards
to embellish the overall look of the photograph. I prefer plexiglass over glass to protect the picture; its
safer and is easily cut with woodworking tools. The client was very pleased with the completed frame.
|
 |