
|
home gallery |
| projects philosophy faq | |
 |
free plans: how to make a Hammock |
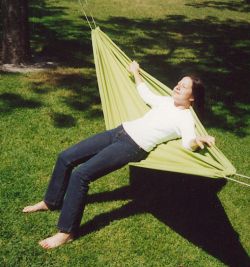
| Basic Description | It's easy to make this simple hammock with durable fabric and some basic sewing. It is a lightweight, stable and comfortable accompaniment to any time spent in the outdoors. We will also show you a wonderful knot that will allow you to quickly tie up your hammock without causing damage to the trees or posts that you use as supports. You can also include mosquito netting to protect against insects. There is something so pure about swinging in a hammock out in nature: read on for all the details. |
At this point, you may be surprised to discover that the hammock itself is finished! All you need to do is cut the rope in half and thread it through the two loops that you just sewed. We recommend cutting more rope than you intend to use because doing so increases the possible locations for setting up your hammock. We cut our 3/8" (1cm) wide polypropylene rope in half to create two pieces that are 25 feet (7.5m) each. |
 |
You can thread the rope through the loops by tying a knot in one end and slowly feeding it along with your fingers. A much better solution is to push a stick (or dowel) through the loop, tie an end of the rope to the end of the stick, and pull the dowel and rope back through the loop. Once you have the rope through the loop, pull it so that it is centered. Repeat this step for the other loop. |
|
© 2000-2008
terms privacy policy |
home gallery |
| projects philosophy faq | ||