 |
free plans: how to make a
Disk Wallet |
| Basic Description |
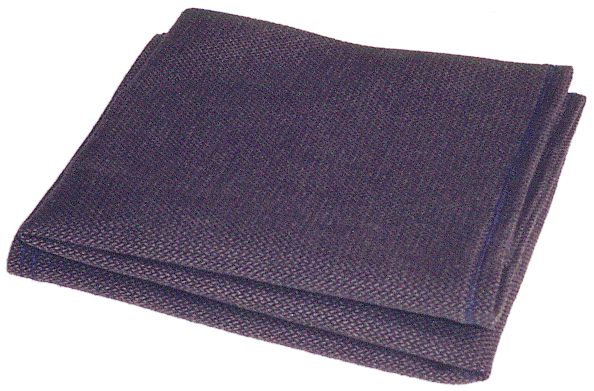
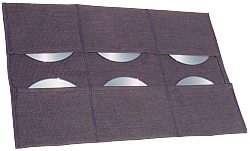
Here is a plan for a simple project: a wallet that holds six compact disks or digital video
disks. It is
an interesting juxtaposition of old and new, but this fabric holder will certainly be a welcome
retreat from those plastic jewel cases. The design we describe below will hold six disks, but
we will describe how to hold two or three times this amount in the review section at the end
of this plan. |
| Materials |
Fabric, thread. A complete
material list is provided below. |
| Tools |
Sewing machine (or sewing needle), scissors, measuring tape.
A complete tool list is provided below. |
| Cost |
The plan itself is free! Estimated cost of materials: $1 |
| Time |
1 hour |
| Difficulty |
Easy |
| Legal Notice |
Use of this website constitutes acceptance of our terms of service policy. |
| Similar Projects |
If you enjoyed this project, you may also like our plan for a cloth envelope. |
Using the disk wallet
storing
Slide up to six disks into the wallet, one in each pouch. If you
want to store more than six disks see the design considerations section below.
|
 |
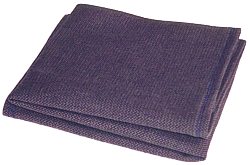
folding the wallet
To fold the wallet, simply fold one half over the other: this prevents the disks from falling out.
Then, fold in the other direction creating a Z-fold as shown in the graphic on the right.
|
 |
The disk wallet that we show in the plan is just a basic version; there are many
options and embellishments that you can include.
fabric
You can use any fabric you like but it should be durable
enough and rigid enough so that it isn't too flimsy.
Softer fabric is best so that you don't scratch the disks.
additions
We kept our wallet free from any additions to make for a sleek and elegant design.
You can add a ribbon or other fastener to keep the wallet in the closed position. Other
decorations can also be added on the inside or outside of the wallet.
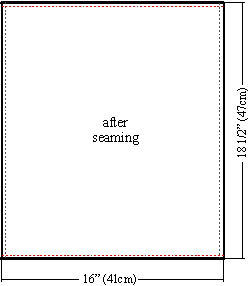
size
The size of the disks themselves limits the sizing options. We have found that the
dimensions given in the plan suitably hold a disk without making it too difficult to insert
and remove them from the pouches. You can increase the number of pouches, but increasing this
number beyond eight, would probably not be too convenient because it would become increasingly
difficult to unfold the wallet. A better way to increase the capacity is described in the following
section.
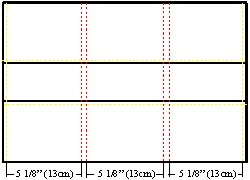
capacity of wallet
One way to change the capacity of the wallet it to increase or decrease the number
of pouches. This technique remains functional from about two to eight pouches; anymore than that
would not be very practical. The best way to increase capacity is to increase the number
of disks held within each pouch. You
can also sew small pieces of fabric to fit between disks within each pouch to act as a spacer and
prevent scratching. Another method is to sew one or two pieces of fabric along the entire
width of the pouches. These pieces of fabric would have to be seamed of course, but they
would easily allow you to double or triple the capacity of the wallet.
If you plan on storing many disks in each pouch, you will need
to increase the distance between the pairs of sew-lines made in step 4 to accommodate
for the increased thickness of the disks; failing to do so will prevent you from being able to fold
the wallet into the closed position.
|
|
wiseGEEK
completely free! |
|
|
|
clear answers to common questions |
|
|