
|
home gallery |
| projects philosophy faq | |
 |
free plans: how to make Date Blocks |
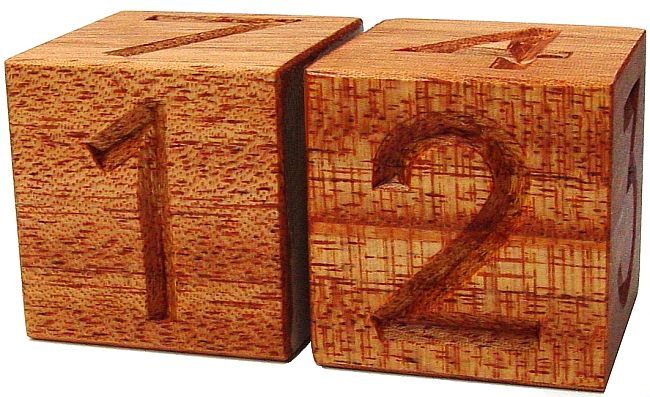
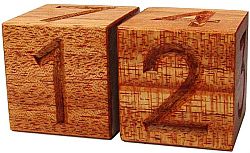
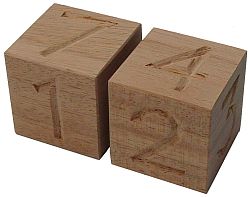
| Basic Description | Here is a free plan for an remarkably simple yet classic date display. The two cubes make a perfect desk item to help you remember what day of the month it is. It turns out that you can display all of the days of a month (one to thirty-one) with only two blocks even though each of the blocks only has six faces. Read on to see how this works and for additional ideas such as a month display. In this plan, we show you how to carve the numbers into wood, but as described in the design considerations section at the end, you could also paint or apply the numbers onto the blocks. |
| Materials | Wood, finishing oil, and glue. A complete material list is provided below. |
| Tools | Table saw, sandpaper, clamps (if you are surfacing rough lumber, you will also need a jointer and a surface planer). A complete tool list is provided below. |
| Cost | The plan itself is free! Estimated cost of materials: $1 |
| Time | 2 hours |
| Difficulty | Easy |
| Legal Notice | Use of this website constitutes acceptance of our terms of service policy. |
| Similar Projects | If you enjoy making the small blocks required for this project, you may also be interested in our block stack project. For a virtually infinite calendar, check out our perpetual calendar. |

The first step involves acquiring the necessary materials and proper tools. It is best to get everything prepared before commencing because you are free to progress without unnecessary interruptions. |
 |
| Item | Qty. | Description |
| #1 | varies | Wood. You will need enough to make two cubes. We glued to pieces of thick mahogany together to create the cubes. If you would like to create particularly large cubes, you either need to find thicker wood or glue more layers together. |
| #2 | - | Glue. We used polyurethane glue, but yellow glue will work fine. |
| #3 | - | finishing oil  |
| Tool |
| table saw |
| square |
| sandpaper |
| carving knife |
| vise |
| hobby knife or carbon paper to transfer the pattern |
| computer printer to print out numbers for carving |
| various clamps |
| disc sander |
| if you are using rough lumber you will also need a jointer and a thickness planer |
For this project you simply need to create two identical cubes. They can be of any size, but using anything smaller than 1 1/2" (38mm) on a side will make the number carving difficult. You can glue together as many layers of wood necessary to achieve the size that you are looking for. We used some 1" (25mm) thick mahogany and glued two pieces together to create a cube 2" on a side. If you are using rough lumber, you will need to surface a longer piece (remember to keep in mind the size limitations of your jointer and thickness planer - both have minimum length requirements). It is critical that all the surfaces are flat and square to the other faces. |
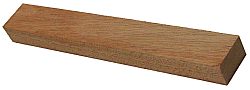 |
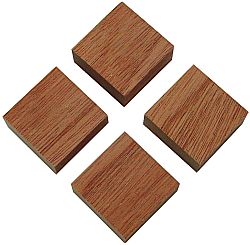
Next cut the piece of wood into pieces. You can use the miter gauge on your table saw, or a chop saw. The length will be determined by the thickness. We are using two layers of 1" (25mm) thick wood, so we cut four pieces that were 1" x 2" x 2" (25 x 50 x 50mm). Next choose pieces that look well together, preferably so that the grain pattern matches. Then, glue up the pieces and clamp until completely dry. |
 |
Once the glue is dry, you can unclamp the cubes. Check to make sure that your disc sander is square to the table and sand the faces flat and make sure that all the surfaces are square to eachother and that you maintain equal dimensions on all sides. |
Once you have created two identical cubes, you can start the numbers. The most critical thing is that you put the proper numbers on the cubes. The order and orientation is not functionally critical, but you might want to think about a pleasing orientation. On one cube include the following numbers: 0, 1, 2, 3, 4, 5 and on the other cube include these: 0, 1, 2, 6, 7, 8. Note that '6' will serve as both 6 and 9. We printed some large numbers with a computer printer (use a bold and sans-serif font) and using clear tape positioned them on the cubes. Clamp one cube in a vise and with a sharp hobby knife, you can transfer the pattern to the wood; cut around the perimeter of the number and remove the paper; the shallow grooves created by the hobby knife will serve as your carving line. Alternatively you can use carbon paper to transfer the pattern, but we prefer using a knife because the groove creates a perfect place to start your carving cuts. Next with a chisel or carving knife, carve out the numbers by creating a angled channel. You can also use a curved or angled gouge and create the channel. Note that the grain direction changes depending on which side of the cube you are carving. The endgrain will be the most challenging, but as long as your tools are sharp, you should be successful. It's best to practice this step on some scrap wood before you put your cubes under the knife. |
 |
Once the numbers are complete, you are ready for the final step. Sand all the pieces using progressively finer grits of sandpaper (we used the grits in the following order: 100, 120, 150, 180, 240, 320, 400) and it's probably a good idea to sand off the sharp corners as well. |
|
Once all of the pieces sanded, they are ready for a finish. You can use a stain and follow with a polyurethane. We used three coats of antique oil which is an oil/ varnish blend consisting of mineral spirits, oil, and a spar varnish. For more detailed information regarding finishing, consider Understanding Wood Finishing by Bob Flexner. Let the pieces completely dry before use. |
MaterialsYou can use any material but we chose wood because it is easy to work with, looks great, and we had lots of scrap laying around. Harder woods are going to be harder to carve, the mahogany that we used worked very well. Other woods that are suitable for carving include basswood, butternut, and walnut. SizeThe size of the blocks is not critical but they should be the same size. If your cubes are too small, it will be difficult to carve the numbers accurately. Larger blocks will be easier to work with. |
We carved the numbers into the blocks for appearance, but you could also paint the blocks and paint numbers or apply decals. This would make the project remarkably simple. Other ways to create the numbers include using a rotary hand power tool, or by burning the numbers into the cubes with a woodburner.
Other ideasWe like to display the blocks alone on a desk or shelf. You could create an open box to hold them and hide the numbers on the other faces to avoid confusion. You can also create blocks with the names of the months on them. Make three pieces of wood that are twice as long as the edges of the cube; make the thickness and width 1/3 the size of the cube. These three pieces will have 12 faces for you to write the names of the month. |
 |
|
© 2000-2008
terms privacy policy |
home gallery |
| projects philosophy faq | ||