
|
home gallery |
| projects philosophy faq | |
 |
free plans: how to make a Bulletin Board |
| Basic Description | Here is an elegant bulletin board that can hold messages, notes, letters and photographs. It acts just like a tack-board, but you don't have to fumble around with push-pins and we think that you will agree that it looks much better. You can customize the colors and the dimension to create a project that fits into its surroundings. |
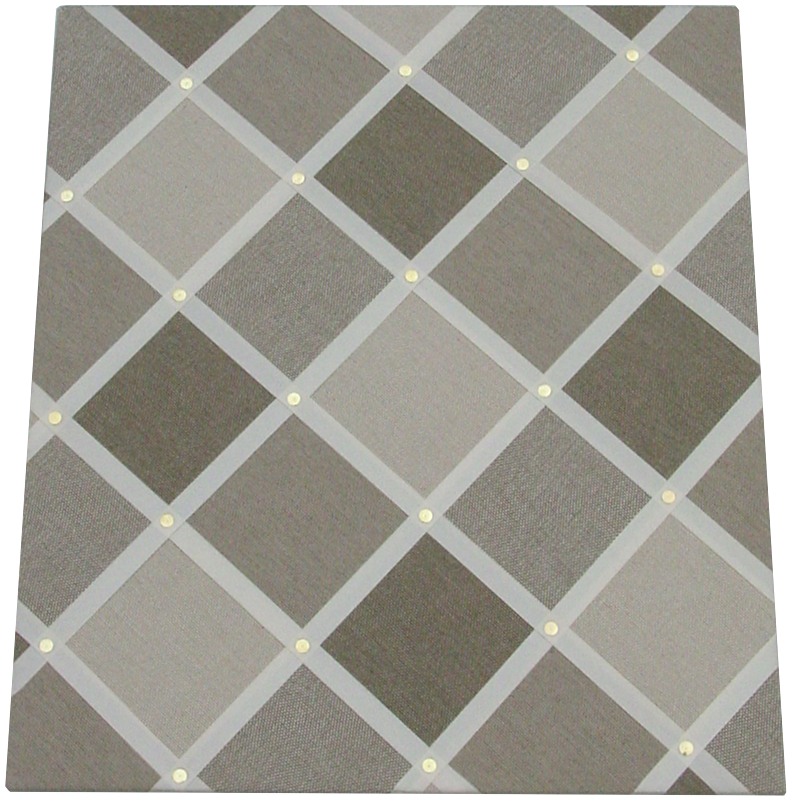
Next you need to attach the ribbon. We have found that the ribbon holds messages best if you position them at a 45 degree angle to the bulletin board. They should be anywhere between 4" and 6" (10-15cm) apart. We made ours parallel to eachother, but of course you can get creative if you like. Measure out the placement of the ribbons and make small pencil marks wherever you want to place them. Wrap them around the edges of the board and tap in a tack at each end (on the underside of the plywood) to hold them in place. You can also use a staple gun for this step. Note that our fabric had a checkerboard pattern and we used this pattern as a guideline for our ribbons; it gives a very interesting effect. Once you are done, you can tap a tack into each intersection of the ribbon. The final step is to attach a hanging device to the back: you can treat it as you would a heavy framed painting. You can use a hook or picture wire; whatever you do make sure that the board will hang securely. |
 |
|
© 2000-2008
terms privacy policy |
home gallery |
| projects philosophy faq | ||